
It may have never occurred to you, but believe it or not, there's an excellent way to ensure that the wig you're wearing fits perfectly and looks exactly how you want it: plucking! Hair stylists have relied on this technique to give their customers realistic hair with a natural line of growth.
Sometimes wigs come pre-plucked, but if yours doesn't, plucking is essential to create a truly undetectable look. Though it does take patience and practice, no one wants to spend money only for their delicate wig to be ruined. That's why we've designed this comprehensive guide—so that everyone can become a pro at wig plucking!
Wig plucking is a unique and exciting way to customize a wig to achieve the perfect look. This process, also known as wig hairline plucking or wig customization, involves manually removing excess hair from the front hairline of a wig.
The goal is to give it a more natural and believable appearance by thinning out the density of the hair. Doing so creates a line that appears and feels just like a real hairline: soft, subtle, yet gorgeous. Through this personalized touch, wig plucking helps anyone reach their desired style goals.

When wigs are made, they have a dense hairline to look full. But this dense and uniform look does not give off the illusion of natural hair when worn. Crafting a perfectly finished wig requires more finesse; one needs to pluck the wig for an effortlessly artless, seamless transition between hairline and skin, including variation in hair density like that of a real head of hair. Plucking also allows for the addition of baby hairs, which further adds to the realism.
Jumping into the plucking process will ensure perfected styling, but there's something crucial you should always know first: the structure and type of your wig.

You'll usually find two general types of wigs—synthetic fibers or human hair. Each comes with its unique approach to plucking that needs consideration for optimum results. Taking a bit of extra time to familiarize yourself with these details offers dividends that won't steer you wrong when it comes time to get styling.
Synthetic Wigs: Synthetic wigs are composed of man-made fibers that come in an array of colors, textures, and lengths. Plucking these types of wigs requires the use of a soft touch, as the synthetic strands can easily break or warp when handled too roughly.
Human Hair Wigs: Human hair wigs are made from real human hair that has been collected from donors, so naturally, they cost more than synthetic wigs. Human hair wigs can be styled and colored the same as your natural hair, but plucking should still be approached with a light touch to avoid snagging or damaging the delicate strands.
To begin plucking your wig, you'll need a few key tools to get the job done. Every good stylist knows that having these items on hand helps them save precious time while ensuring quality results:
Sharp Tweezers:

The sharp end of tweezers allows for a finer degree of precision when removing individual strands from the wig.
A Wide-Tooth Comb:

The widely spaced teeth of a comb help to spread and gently tug on the strands, allowing you to easily find which ones need to be plucked.
Canvas Mannequin Head:
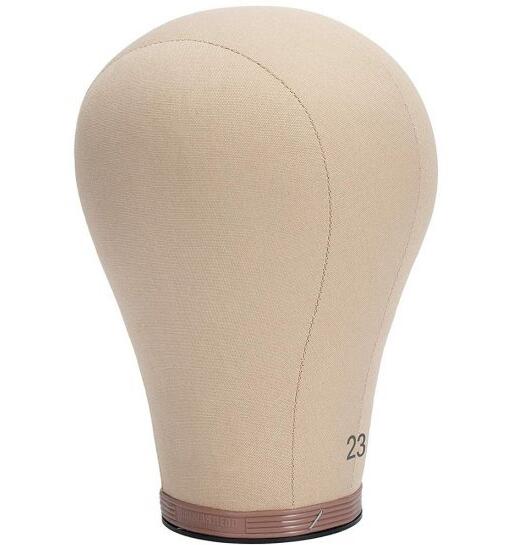
Use a wig canvas mannequin head to secure the wig while you work. This ensures stability and helps maintain the wig's shape.
Rattail Comb:

Use a rattail comb to create the natural line of hair growth you want for your wig. This tool is great for creating a subtle fade or gradient effect, and it helps make sure that each strand is evenly spaced out.
Wig brush:

A wig brush is essential for styling and smoothing out the hairs on your wig, as well as for removing any excess hair that has been plucked. It's also great for creating volume and texture.
Large Clip:

These clips are a must-have tool when it comes to keeping the hair in place while you work. They come in handy when sectioning off larger chunks of hair and are great for keeping the wig in place while plucking.
Eyebrow Razor:

An eyebrow razor is a key tool for smoothing out baby hairs that have been plucked, as well as getting rid of any excess fuzz around the edges of your wig's hairline.
Wax Stick:

For added texture and hold, wax stick is a great way to achieve your desired look. It can be applied before or after plucking and will help keep the style in place.
Spray Bottle (if you want to pluck your wig wet):
If you choose to pluck your wig while it's wet, a spray bottle is perfect for keeping the strands damp. This allows for easier plucking as the hairs are less likely to snap and break off when wet.
Now that you know what tools are necessary, it's time to get started on the fun part—plucking your wig! Let's use lace front wigs as an example this time. Here are the steps you should follow for the best results:
It might seem like a no-brainer, but there is an important step that should not be overlooked. Time to unbox your wig and place it on the form wig head. Visualize the wig stand as if it were your head itself, with the front of the wig sitting where your hairline starts and the back of the wig where your neck may be located at.

To keep your wonderful new wisp of hair from going all over the place, be sure to fix it securely in its spot with 8 to 10 T-pins mounted around the lace directly at its front end. Additionally, another set of these nifty pins can also be placed along its back part for good measure.
To begin, take a wide-toothed comb and use gentle strokes to carefully detangle the strands of hair in the wig. Starting at the ends and working your way upwards toward the roots will help prevent any damage from occurring during detangling.
Next, apply two palm-fuels of mousse along the hairline of the wig, then use either a rat-tailed comb or wig brush to carefully smooth out and straighten the hair before molding it onto the wig head.

This step is necessary so that you can see more accurately where to have control when creating a clear hairline on each side. You can also bring all the pieces together by taking sections at a time like you would do for a ponytail, and hold them loosely behind with one large clip.
If you're a wig enthusiast, taking a picture of the desired hairline look is essential before embarking on the plucking process. Once it's ready to go, whip out your phone for pictures of your natural hairline – several angles are key!

The most natural-fitting wig hairline should imitate your natural hairline, so turn to photos taken outdoors on a sunny day or in a brilliantly lit room for sought-after results. Photograph from both sides and take a nice straight-on shot as well for comparison during the crafting stage. Now you're ready to create!
Grab your beloved rat tail comb as it's time to carve out the shape of your natural hairline on your new wig. You can use whatever side of the comb works best for you–experiment and enjoy.
This creative process does require patience and precision; try taking small sections of the wig at a time to perfectly frame your face and make sure you're referencing photos of your actual natural hairline every so often.

Pause for a few seconds and take a glance at what you created in the prior step. Make sure it's symmetrical and conforming to the pattern of your scalp– otherwise, you may need to resort to some changes.
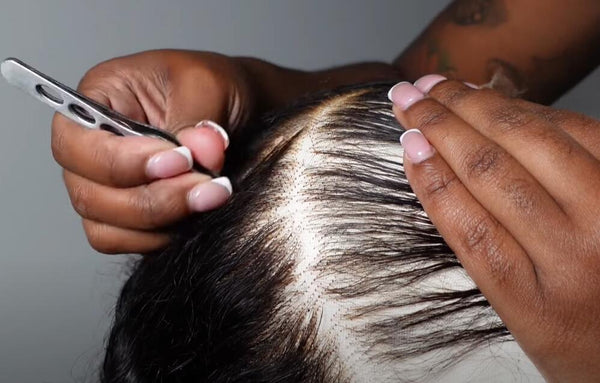
It's time to start plucking. Grip the tweezers with your dominant hand and turn them so that the shorter side, which won't take out as much hair as the other, is pointing downwards.

This is a great starting point for any beauty novice. When using the tweezers, it's important to keep a few tips in mind — grab hairs as close to their root as possible while being gentle so you don't pull or snip too far down at the lace.
Congratulations! You've successfully plucked the first layer of your wig. The goal for the next step is to thin out any bulkiness. You can make this happen by continuing to pluck further layers – remember, keep it simple.
Start by taking the clips out of the hair so that it entirely covers the mannequin head. Position the mannequin head slightly to one side; this way, you can start working with one side of the wig and begin to pluck.
Make sure to use your rat tail comb when using a rectangular section about 1 inch from the hairline and spanning between your temple down to where your ear should be located. Plucking this designated section will ensure success in budding your wig's new look.
Separate and Pluck the Rectangular Section:
Divide your hair into two sections by using a clip or two to hold the rest of the hair out of the way and create a horizontal part at its midpoint. Begin plucking from the top right corner of the lower section, working millimeter by millimeter. Pluck just 3 or 4 strands at every corner and step down before continuing again.
Work down until you achieve ear level in the first layer. Once complete, create a new vertical part beside the first layer. It should be 1 mm in width, and you need to repeat the meticulous steps five or six times altogether.
Repeat the Process for the Other Side:
To achieve the desired finish, it's important to ensure that you have thinned the section. Take out the pin in the upper half before continuing to step 2. Moving onto the other side, you can pluck 5-7 layers at a time.
However, as you get further through, start picking smaller sections across the center part of the wig for a more aesthetically pleasing design. Depending on which style or look you're going for, this process could give you between 7-10 layers throughout that particular section. Making sure not to focus on one area too heavily will help secure even layers.
To finish off this look, brush all the hair strands that are plucked off, and clean up the entire perimeter of the wig with a simple spritzing of hairspray that helps keep all those strands in place and can also act as a barrier against any flyaways. You may also choose to trim the ends of your wig with a pair of scissors for an extra polished look.

With this advanced plucking technique, you can now shape and style your wig according to your tastes! From creating bangs to forming gorgeous side parts, these skills will serve you well in the long run and can be applied to any wig. All you need is a bit of patience, creativity, and some clever tools – so go ahead and show the world your inner diva!